Have you ever come across a piece of furniture that had center to center hole measurements that are not a standard size? In case you were wondering, standard size is typically 3 inches.
In most cases when this happens, I typically fill in the holes and drill new holes, but that option really works best for when a piece is being painted.
A cringe worthy solution is when the drawer pull is swapped out for two knobs instead, like this:
Please don't ever do that. It looks horrible.
So what is another option?
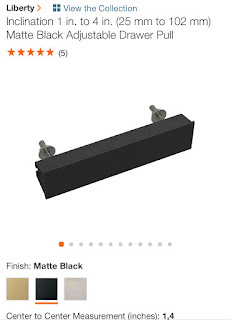
Drawer pulls with adjustable center holes!!!
Okay let me back up for a minute.
I have been looking for a sofa table for awhile. I was being picky though, I needed the correct height and length, and for the size I wanted these pieces were are to come by.
Until I found this on Facebook Marketplace:
I realize that this was poorly painted by someone else, but I was up for the challenge. Lucky for me, the person who had previously painted it did not bother to properly prep, and a lot of the paint was just chipping right off.
I don't have an exact number, but my guess is that it probably took about 40 hours to completely strip all the nasty paint and finish off. After all of that work, I couldn't bring myself to paint or stain it.
The hardware wasn't my style. I wanted something a little more modern. After a lot of searching though, I couldn't find any hardware that was 3 and 5/8" to fit the existing holes. This was not a standard size.
Until I stumbled across these pulls from Home Depot:
I had to order them online but they showed up pretty quickly. They came with directions and were so easy to install, I didn't even need any additional tools besides what they supplied.
There were a few different sizes to select, based on the size of the holes. Meaning if the holes were spaced further than 4 inches apart, a wider pull would be required.
All you need to do is place the screws in the holes with the bolt part facing the outside, add the washer and nut on the inside loosely tightened, and then slide the pull over the bolt part on the outside. Use the wing nut included to tighten completely. Easy as that! I do have a video tutorial explaining this on my Instagram highlight stories.
I'm so happy to have found this option. I'm sure I will be using these in the future, I love the look of them and how easy they are to install.
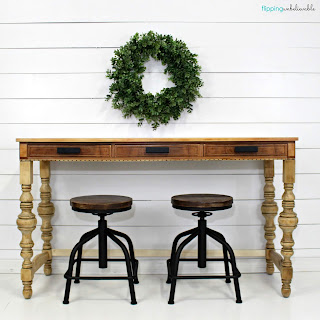
Here it is all finished. What do you think? Was it worth all the effort?
Don't forget to follow me on Facebook and Instagram for even more inspiration!


No comments:
Post a Comment